You'll learn how to configure your tech stack, design and distribute wallet passes, automate engagement, and prepare campaigns to increase retention and loyalty.
1. Overview of Your Stack
Before starting, define the tools you'll use. This guide assumes:
Shopify or Shopify Plus
JeriCommerce Wallet (installed from the Shopify App Store)
JeriCommerce Loyalty (built-in loyalty platform)
Automation platform: Klaviyo or Shopify Flow (optional but recommended)
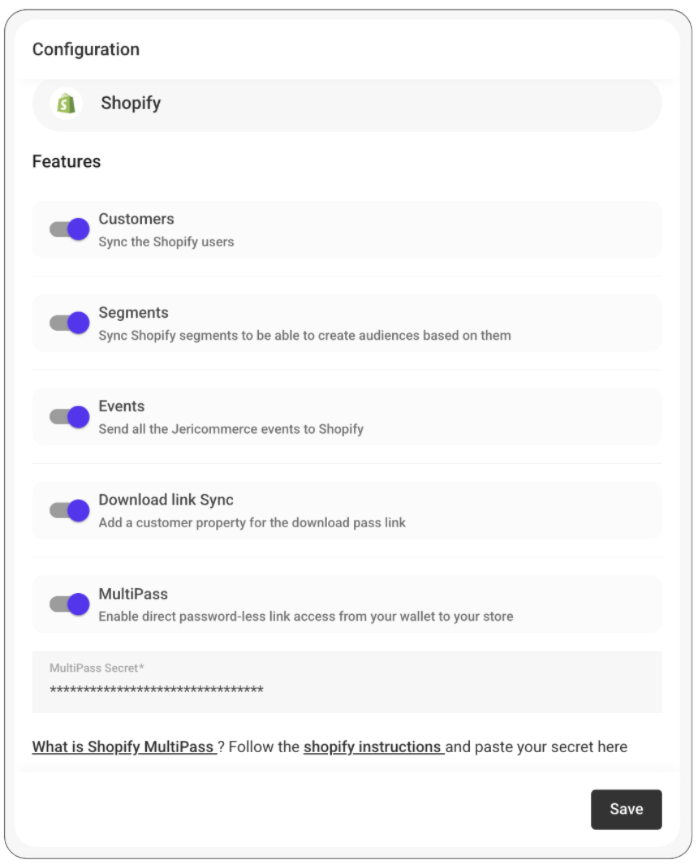
If you're using Shopify Plus, you can enable Multipass loginfor seamless wallet-to-store navigation.
JeriCommerce > Settings > Integrations > Shopify
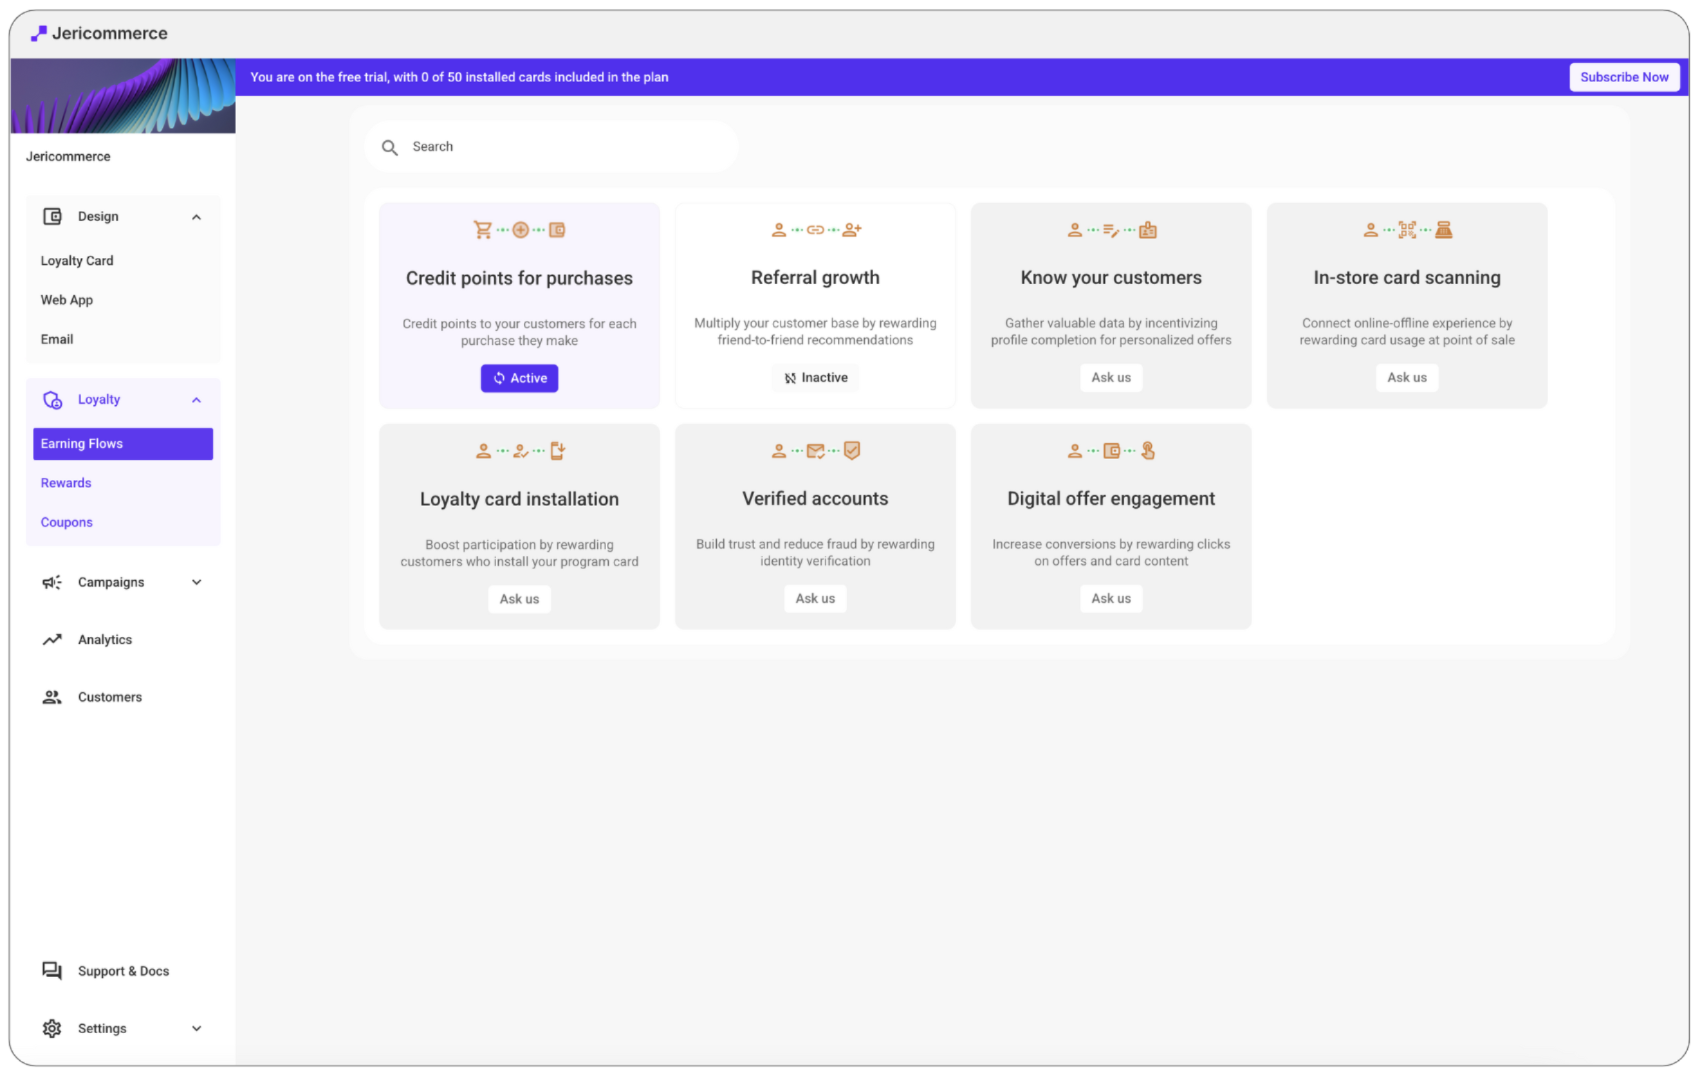
2. Loyalty Program Setup (JeriCommerce Loyalty)
JeriCommerce Loyalty is the built-in loyalty engine. It’s designed for brands that want a simple, integrated way to manage points, rewards, and loyalty flows directly within the JeriCommerce platform—without relying on third-party providers.
Set Up Your Store & Labels
Choose to create new loyalty program during the onboarding flow.
Configure your store settings and basic loyalty program labels from the onboarding flow or the JeriCommerce admin.
Note: JeriCommerce Loyalty does not support tiered programs. If you integrate a loyalty system that supports tiers (e.g., LoyaltyLion), they can appear on the wallet pass.
Optional Add-on: Storefront Embeds
Bring the loyalty experience directly to your online store for better conversion.
App Embed Widget: Enable the JeriCommerce widget in your Shopify Theme Editor to allow customers to access rewards and tiers on-site.
Product/Cart Blocks: Add native Shopify App Blocks to display real-time earning potential (e.g., "Earn 100 points") on product and cart pages.
Customize your brand colors, logos, and messaging.
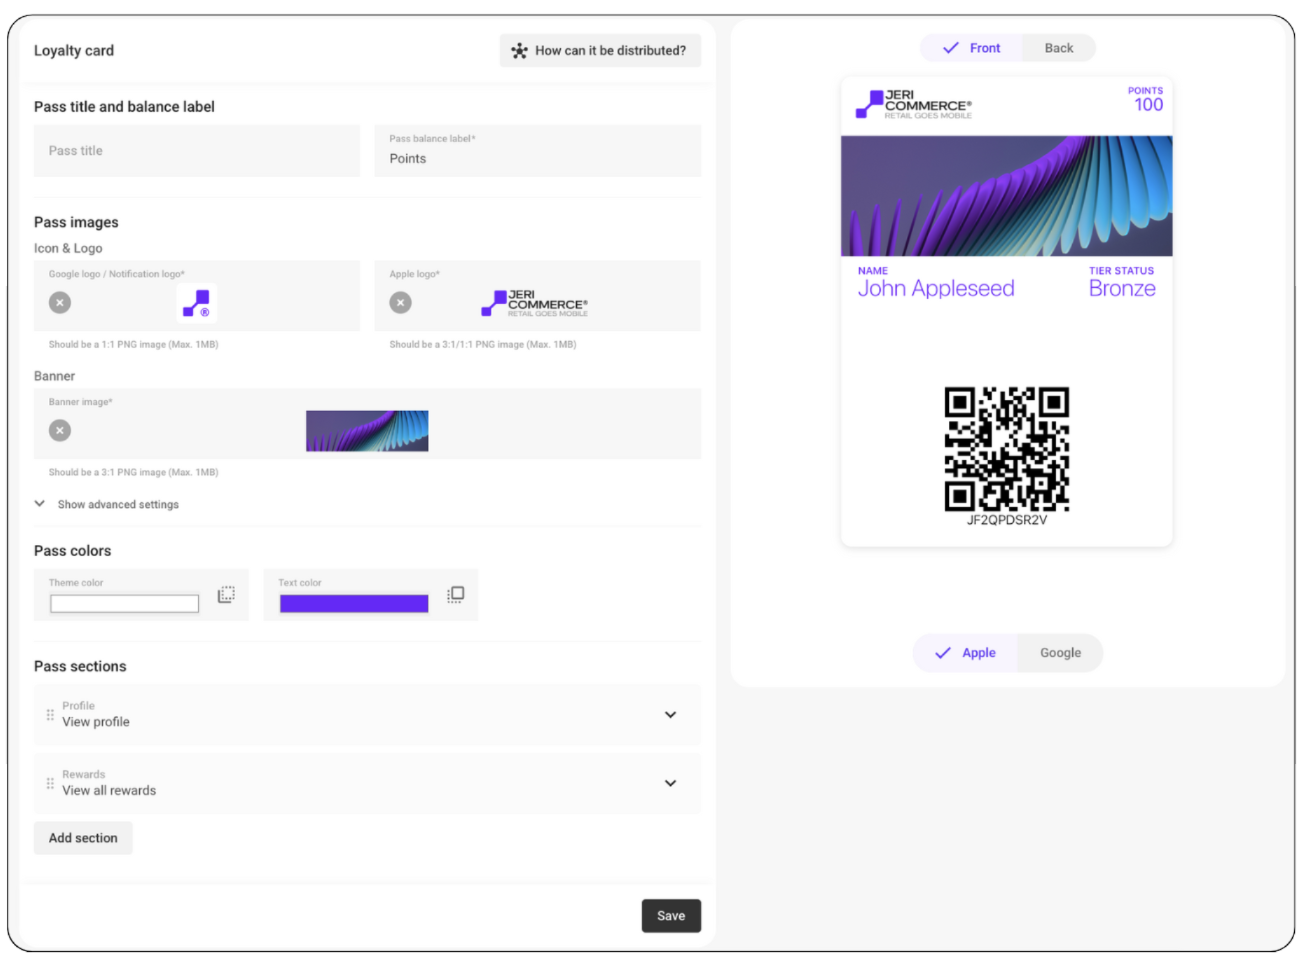
JeriCommerce > Loyalty Cards
Add Key Links to the Pass
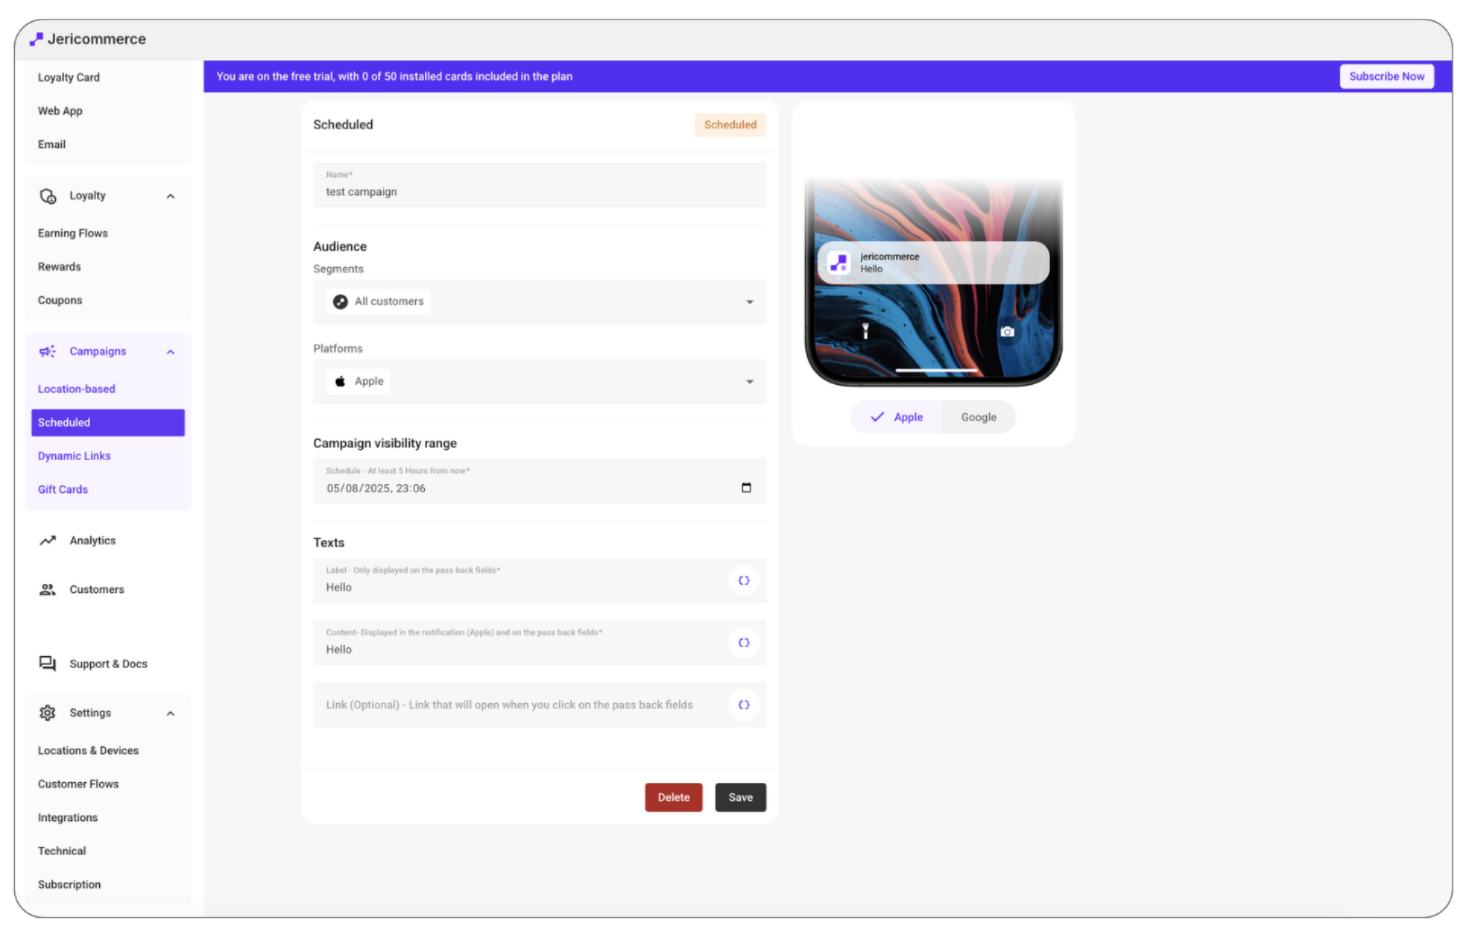
Set up sections and links embedded in the Loyalty Card or campaigns for quick access to:
Shopify login (Multipass login if on Shopify Plus)
Customer profile/subscription
Rewards profile
Product or landing pages
Ensure sync is complete and Multipass is enabled (if applicable).
Android Wallet Back sections design
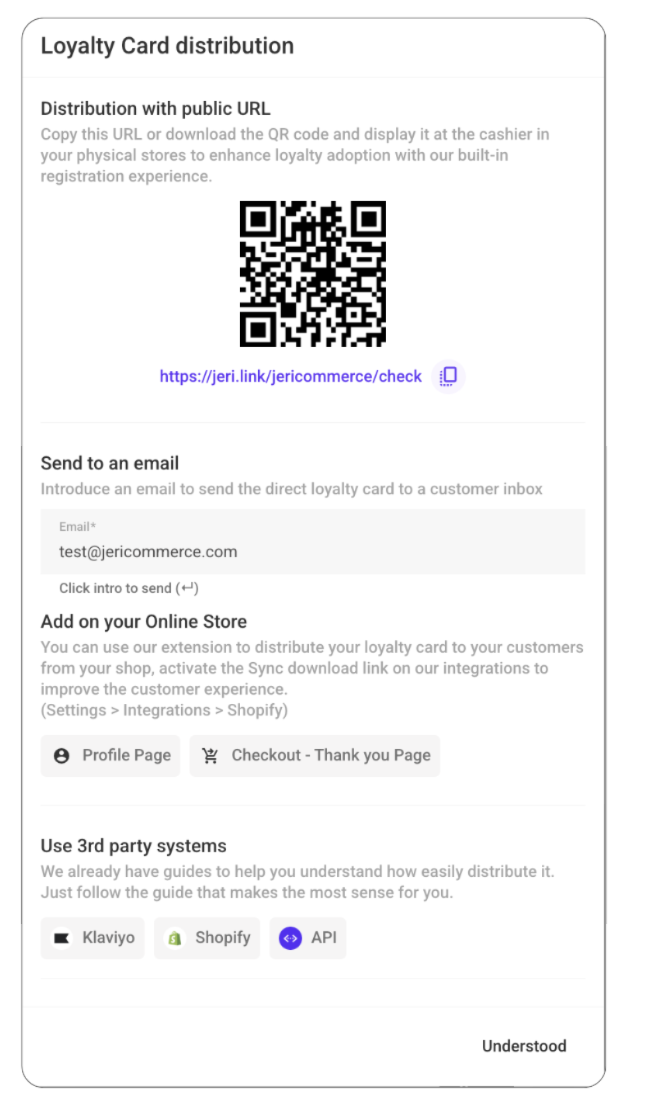
4. Wallet Download Links
You can distribute wallet passes using dynamic or static links.
Learn How to distribute loyalty cards to your customers and how to create a unique customer link that enables sending the loyalty card to their email with a single click